2. Creating the input file
Our program expects a TIFF-Input file with 8-bit or 16-bit greyscale input. All the undefined heights must have the color white (0xFFFFFF). Furthermore the upper left pixel must be set (this means this pixel must not have the color 0xFFFFFF). In the following, you will find instructions on how to create such an input-file with GIMP 2.4!
Step 1: Adding new layer
We started with a digital map of our terrain, which you can see here (the original size was 6614 x 4678 pixel, TIFF greyscale 8bit). To convert it to an uncompressed TIFF, you have to open your input picture with GIMP and then save it as an uncompressed TIFF-Image (save as -> choose file-format TIFF and confirm -> choose 'uncompressed' in the upcoming popup).
Now, we add a second layer to the picture. Therefore, you have to open the dock 'Layers, Channels, and Paths', which is opened by default, but you can reopen it in the options:

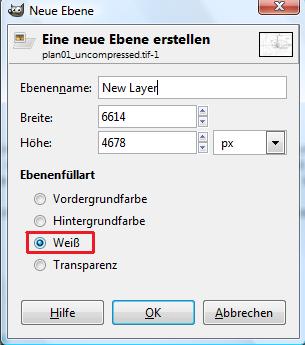
Within this new dock, you can now choose the background layer and rightclick it. In the upcoming popup, choose 'new layer'. Choose 'white' as the layer filling in the upcoming dialog box and confirm.
Step 2: Setting height points
We can now mark all the height lines in the image. Since the height is only a relative height, you have to decide, how many lines you want to mark.
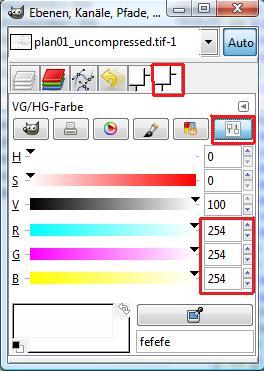
The colors of each height line can be calculated by the forumla 254-254*(NR-1)/MAX (MAX = total number of lines, NR = number of the actual height line. NR starts counting with 1, where 1 is the highest height line!)
You have to enter this values in the 'FG/BG Color Dialog' (how to get the FB/BG Color Dialog):
Now, reduce the covering power of your new layer:

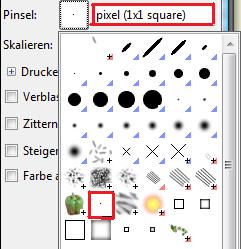
With the (above) calculated color, you can now mark the height lines. Choose the pencil (shortcut 'N' in the main GIMP window) and set the thickness to 1x1 square pixel (see screen below):
Ensure, that the new layer is marked while setting the new points. For more details, you might zoom in a little bit. Remember, that the highest height map gets the color 0xfefefe, which means that you can not see it (it is almost perfect white). So, maybe mark this highest height line at the end, if you are familiar with the what you are doing.
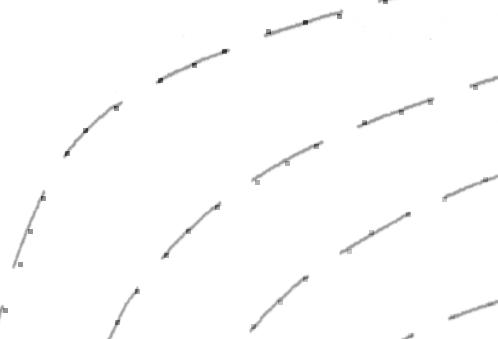
After marking the picture, it might look like the picture below (consider that the marked points have a size of 5x5 pixels instead of 1x1 so that you can see them right here, but do not do this in your picture!).
Now, you do have to set the upper left pixel. This pixel must have a color unequal 0xFFFFFF (= all colors but not white). It is used to approximate the height beyond the last height line. In most cases it is proper to give this pixel the same color as the outermost height line.
Step 3: Saving the picture
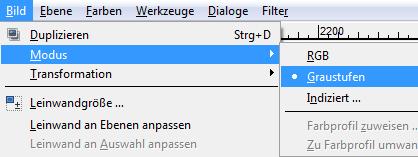
The last step is to save the picture with the marked points without the original map included. Therefore, you have to delete the layer with your picture (rightclick -> delete layer) and make the new layer a greyscale picutre (picture -> mode -> greyscale)
Furthermore, you have to delete the so-called 'alpha channel' from your new layer. Rightclick your new layer and choose 'remove alpha layer'. You might also want to increase the covering power of your new layer up to 100%, now.
If you have done all this, you can just save the picture as an uncompressed TIFF. If you did all in the right way, the new picture should have a size of about width*height byte.