The main limitation of current VR setups is most of the time the spatial limitation:
Either cable length, tangled cables, or a lack of space hinder a free 360° movement of the user. While this might seem like a relatively low impact, since we are used to free movement in the real world, initial tests have revealed a huge impact in scenes with a focus on exploration: Most users usually wanted to turn back and return to the origin at some point, which requires a full 180°, which is very uncomfortable with the attached cables, even if the user is placed in a rotating chair, as recommeded in the best practices. Such turnarounds are also dangerous due to accidental tripping over cables. This is - among others - the reason why 360° scenes are usually avoided as far as possible, and not recommended by the best practice guidelines.
The unique feeling of exploration, as well as a certain user freedom were supporting arguments for the implementation of such sceneries. Instead of ruling them out from the beginning, this project tried to find ways to bypass the mentioned limitation.
One obvious possiblity is to enable manual changes to the viewing direction by means of the mouse or gamepad. While the movement is still wholly controlled by the user, such rotations do cause instantaneous nausea for all users.
Yet, this approach resolved the issue of tangled cables and turnarounds, which gave reason to further investigation.
Jump transitions
The intermediate step was a jumping transition, which basically rotates by a set degree on button press, usually 45° or 90°. Theoretically, this could happen either by a single transformation, or a gradual change over a short period of time. The final implementation will reveal a combination of both, and is discussed later in this chapter. While this immediate change is still slightly uncomfortable, it has enhanced the approach even further.
Two things should be considered, and passed to the user in some form of tutorial:
- Keep the head stationary while pressing the button, to avoid conflicting sensations from the vestibular system (e.g. "head rotates right"), and visual cortex (e.g. "saw a rotation to the left"), in addition to conflicting inputs leading to potentially undpredictable behaviour of the program.
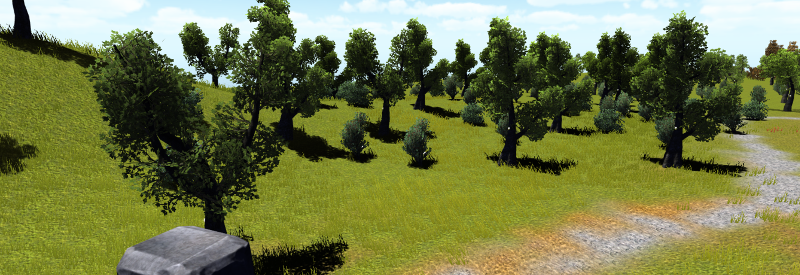
- The fixed angle should be with respect to the scene. While smaller angles lead to a more natural feeling, multiple button presses to simply turn by 180° are neither pleasent to the eye, nor to the user. If the scene is structured in a linear fashion, and might lead the user along a set path, 45° are recommended. For larger scenes, as for example the outside model of the Synagoge Langen, it is recommended to turn by 90°. Experiments have been conducted with values based on a trisection (30°, 60°, 120°), yet a division into 4 parts (45°/90°) has proven to be more natural, since it is easier to maneuver in most scenes. The only exception are circular or hexagonal scenes, which are assumed to be pretty rare. Make sure that the user get the time to experiment with the rotational angles beforehand.
The value for the rotation can be individually. Do notice that it is not set for each individual scene, but rather for the whole project.
Blinking Transitions
The optimal solution has been presented by Tom Forsyth in his talk "Developing VR Experiences with the Oculus Rift " at the Oculus Connect summit 2014 [14], and involves a simple yet effective trick, which once again shows just how immersive (and impressive) VR really is:
Instead of simply transforming the viewport after the button press, the proposed solution introduces some form of blinking.
Either by the means of shading, or actual virtual blocks in front of the camera, the vision of the user is temporarily cut off, similar to a blink. After this fade-out, the transformation is performed, and afterwards the "eyes" of the user open up once again. The most interesting part of this technique is, that the initial implementation of Tom Forsyth worked with a time span of roughly 300 ms. By continually reducing this time frame, they noticed that the fade was not visible from a certain lower boundary onwards. While the first assumption was that the engine simply could not handle such a framerate, although it was clearly visible on a standard monitor, step-by-step iteration through the trigger event revealed that instead, the subconscious part of the brain would kick in, and interpreted the fade as a blink of the user's eyes. Most importantly, the user experience was much more pleasant with the fading, while still maintaining a certain invisibility to the user.
During tests for this project, users did only notice the blinking after it was explicitly told to them to watch out for it. Even then, most of them did not catch it every time.
Technical aspects
This project uses the mentioned "physical" solutions, with two blocks placed in front of the user, as it can be seen in the provided screenshot. This was both the easier implementation, and is less computationally expensive, since the shaders usually require a specific set of overlay and UI as well, which were not supplied by Unity for the VR controllers, as further discussed in the chapter FPS controller. Importantly, collision detection should be turned of for the blocks, to avoid getting stuck in doorframes.
The actual "blinking" has been implemented as an animation with the help of Unity's animation tool. This poses the only disadvantage of the physical approach, since the minimal time span needs to be set to less than 150ms, which poses an upper limit for the recognition as a blink by the visual cortex. The animation tool is theoretically limited in its speed, and can react by factor 10 slower compared to a shader. Since the reaction time is still fast enough for a blink, this does not matter at all for this scenario.
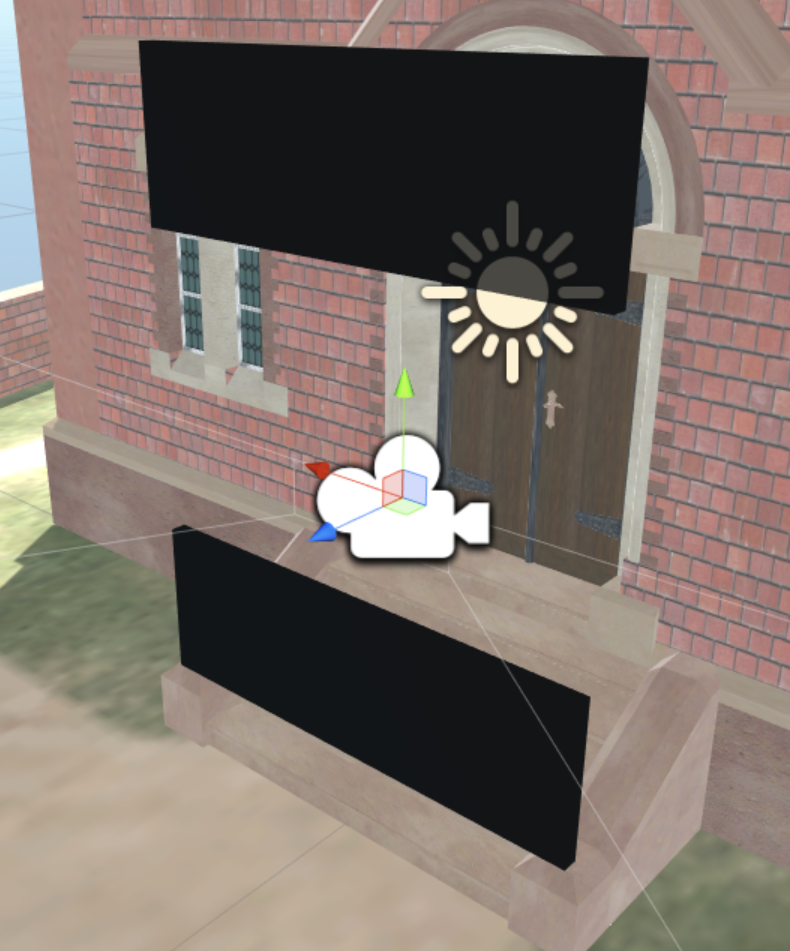
Figure 1: Blinking blocks attached to the camera model.
Scene Transitions
The transition between various scenes is done similar to the blinking transition, because the head-tracking is disabled during the loading process, leaving the user in a disoriented state, and a proneness to nausea.
Since the loading may take multiple seconds, the fade-out is stretched to a fraction of the blinking time, and does not fade in until the new model has been fully loaded. Here one disadvantage should be mentioned explicitly: While Unity does provide a trigger event for the leaving of a scene, but not the (re-)entering of a scene, the exact moment at which the new model is ready can not be precisely determined, leading to a belated or premature fade-in.
Here it should be advised to use a sleep-timer for the waiting, with the time set rather too long than too short.
Teleportation
In addition to a visual path (see chapter "Information Presentation"), trigger objects have also been extended with a teleportation feature. This is especially handy when handling objects which are observable not only from one height level / perspective, but rather require the visitor to take multiple perspectives.
One example could be a church tower or skyscraper, with the initial entry point located at ground level, and a teleporter to the top. This is different from scene transitions in such a way, that they do not require additional loading of assets or objects, but simply perform a translation instead of a rotation. The teleporters should be distinctly different from standard pathing points, by e.g. simply altering the color, to avoid a sudden unsuspected transformation.
|